Professional vs DIY Home Networks: What Good Design Actually Changes
What's the difference between a DIY network setup and a professional network installation? The meaningful difference is not the label on the installer or equipment. It is whether the network is designed from requirements, installed cleanly, measured after installation, documented, and supported.
A well-chosen consumer system can serve a modest home, and a badly designed professional system can still fail. Professional help becomes valuable when the property, device mix, cabling, security, remote management, or service expectations require more planning than a single router provides.
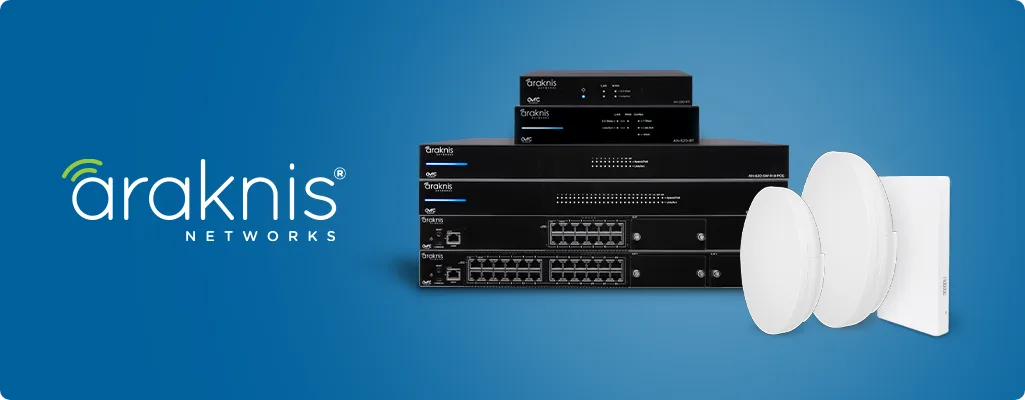
This guide uses an Araknis installation to show the parts that can add real value: organized equipment, appropriate routing and switching, measured access-point placement, power management, configuration, and clear service access.
Quick answer: Choose professional design when you need a site survey, wired access points, managed switching, VLANs, remote service, rack organization, documented configuration, or validation across many rooms. Choose DIY when a supported consumer system meets the measured requirements and you are comfortable maintaining it.
What Makes This Network Setup Serviceable?
Here is what the installation shown above contributes beyond appearance:
Network-Only Installation: Just What You Need
If you only need networking (not a full AV system), this is what you get - a clean, professional network-only installation. No AV rack needed, just the essential networking equipment mounted on the wall.
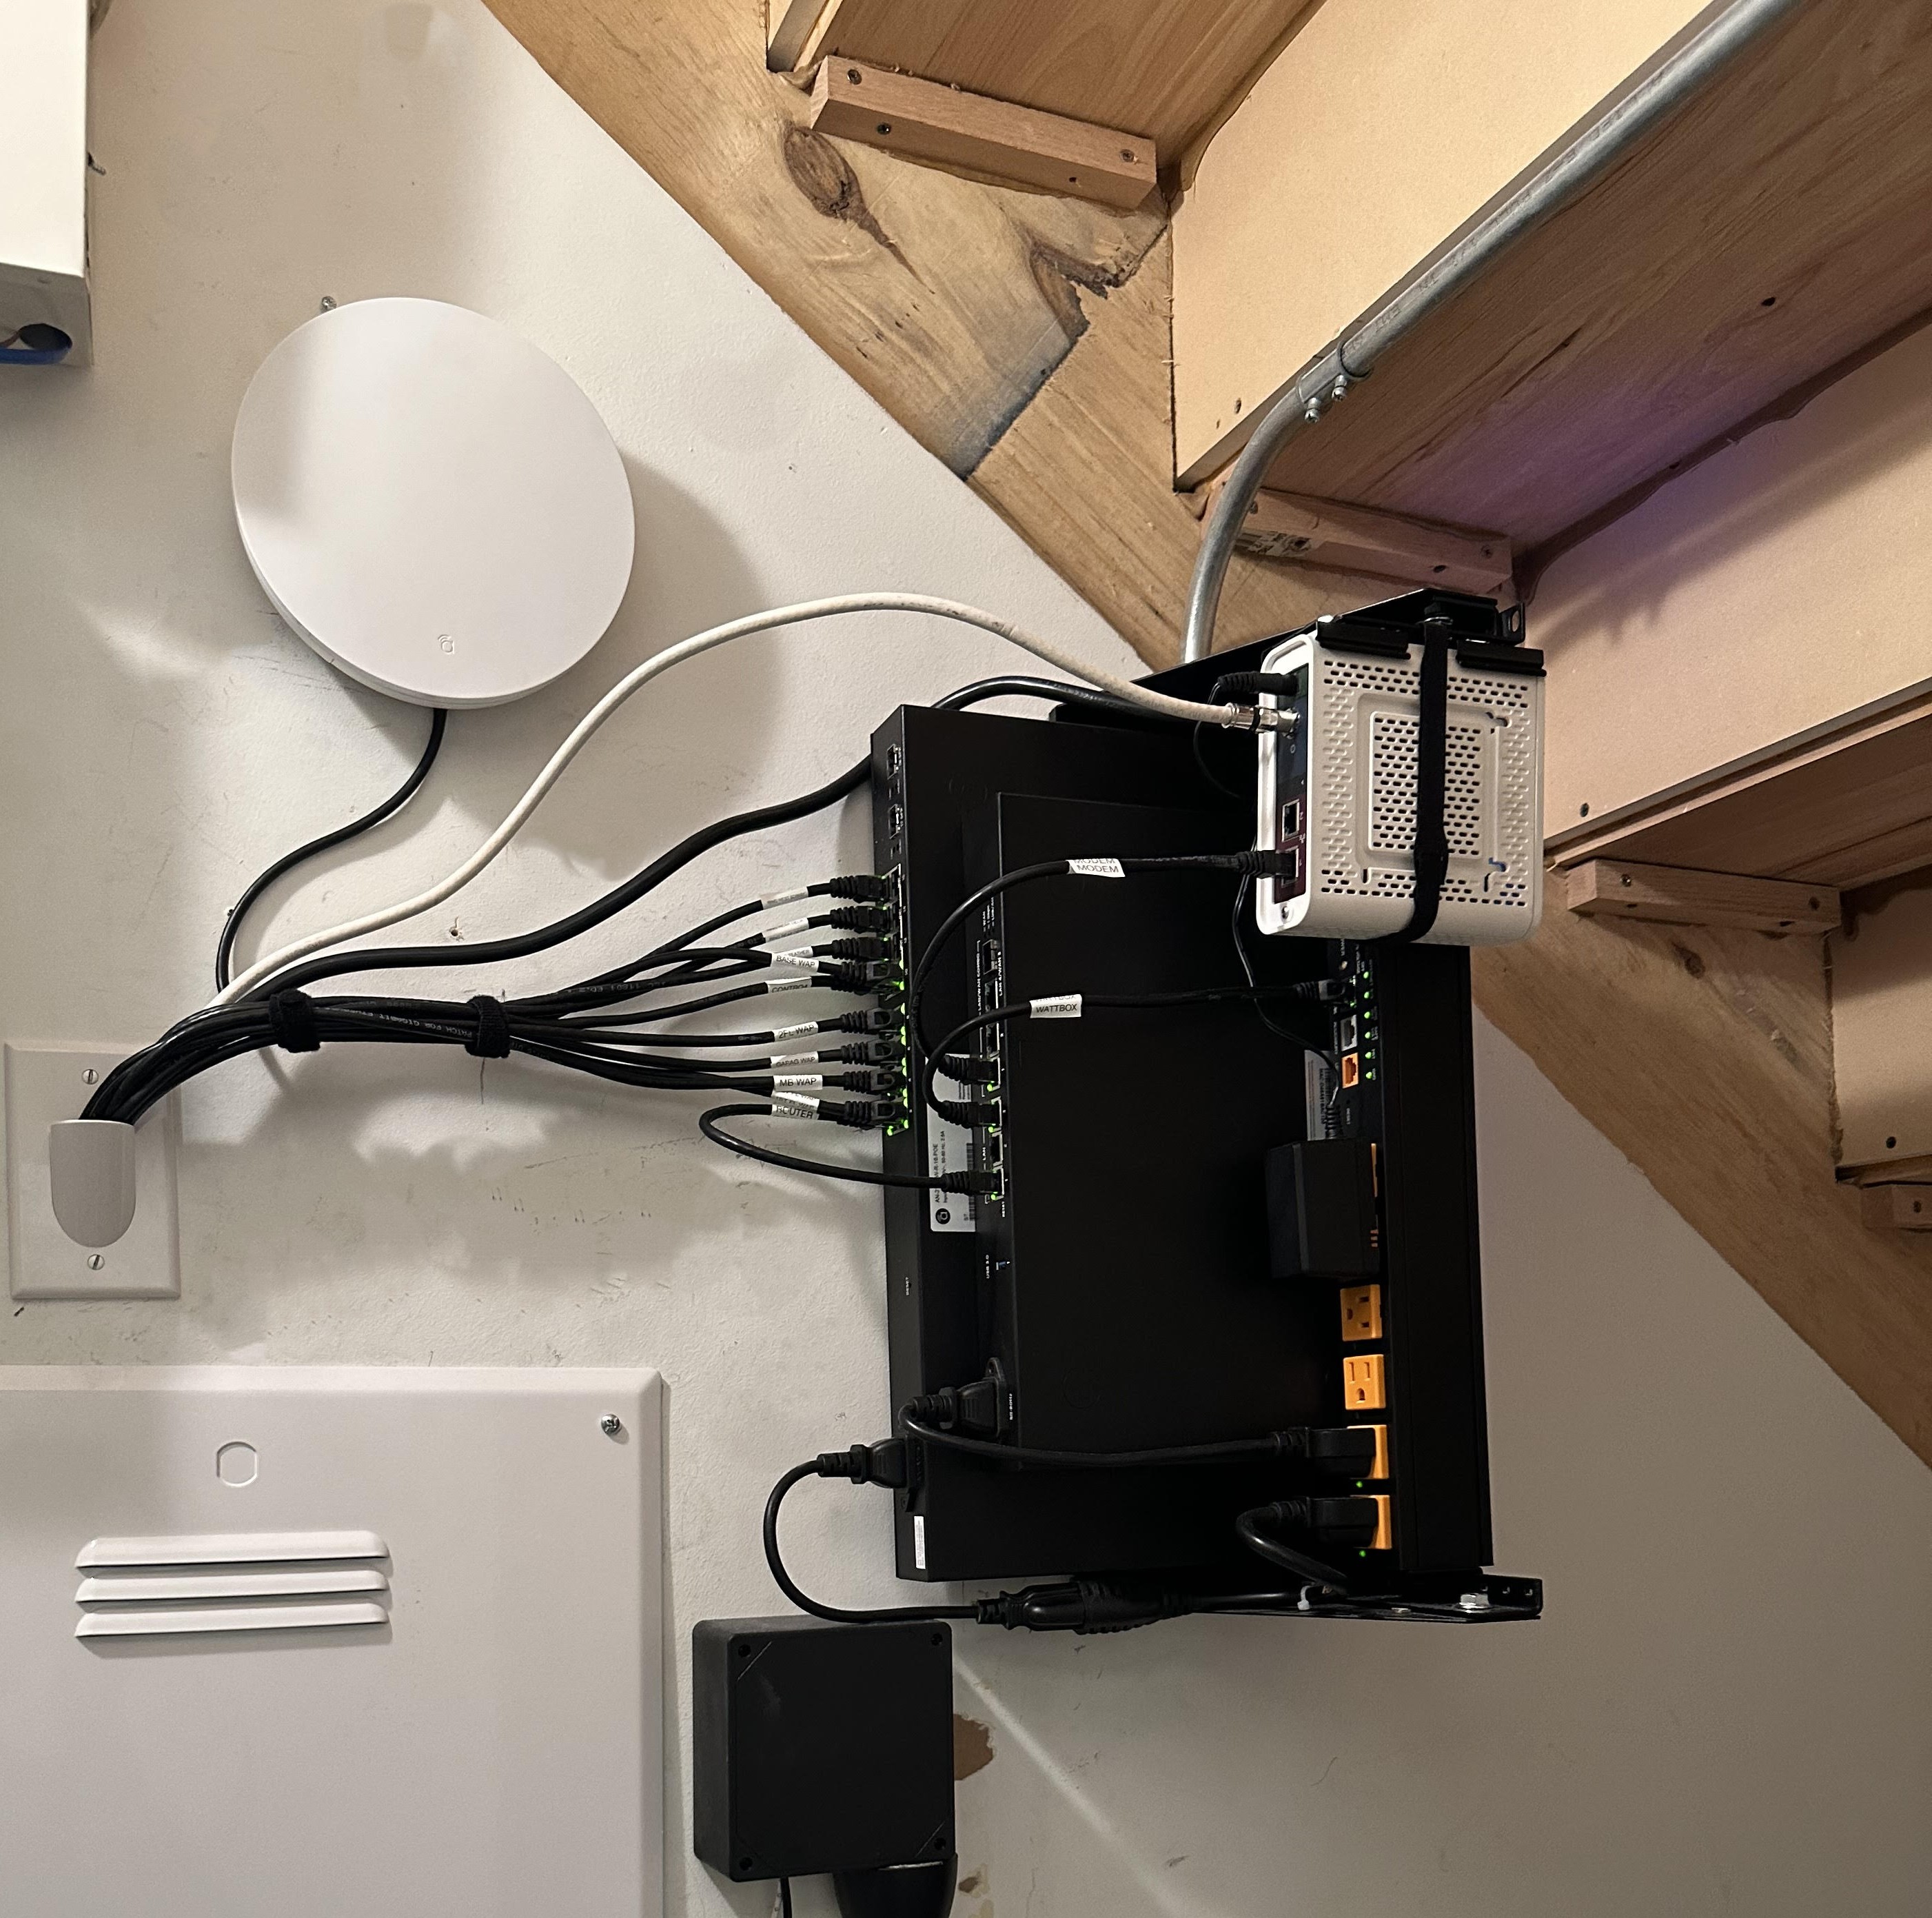
Network-only installation: 4U wall-mount rack with router, POE switch, and Wattbox power management. Useful if you only need networking - no AV equipment required.
This is one clean way to organize a small network. The exact rack size and equipment should follow the scope:
- 4U Wall-Mount Rack: Everything is organized, accessible, and professional-looking - useful for network-only installations
- Router: Araknis hardware selected for the connection speed, enabled features, and service requirements
- POE (Power Over Ethernet) Switch: Powers access points and devices without extra cables
- Wattbox Power Management: Smart power management and remote reboot capability
- Strategic Access Point Placement: Multiple WAPs placed for strong coverage
- Professional Cable Management: Clean, organized, and labeled for easy troubleshooting
- Network-Only Setup: If networking is all you need, this is the clean solution - no need for a full AV rack
💡 Network-Only Option: Don't need a full AV system? This network-only installation is a clean fit. Just networking equipment in a clean 4U wall-mount rack. If you only need WiFi, network infrastructure, and smart home connectivity, this is exactly what you get - no unnecessary AV equipment.
Component Breakdown: Why Each Part Matters
1. A Router Sized for the Actual Connection and Features
What you see: An Araknis router selected for an integrator-managed residential network.
What to verify:
- Routing throughput: Confirm performance with the security, VPN, filtering, and traffic features that will actually be enabled
- Quality of Service: Configure only when the traffic goal and internet bottleneck justify it
- Security: Review firewall defaults, update policy, account protection, remote administration, and network segmentation
- Capacity: Count traffic and applications, not just the number of devices
- Management: Document who has remote access, what is monitored, and how that access can be revoked
ISP equipment: Some ISP gateways are adequate; others lack the placement, features, or management a project needs. Test the actual model and service before replacing it, and avoid unsupported device-count rules.
2. POE (Power Over Ethernet) Switch
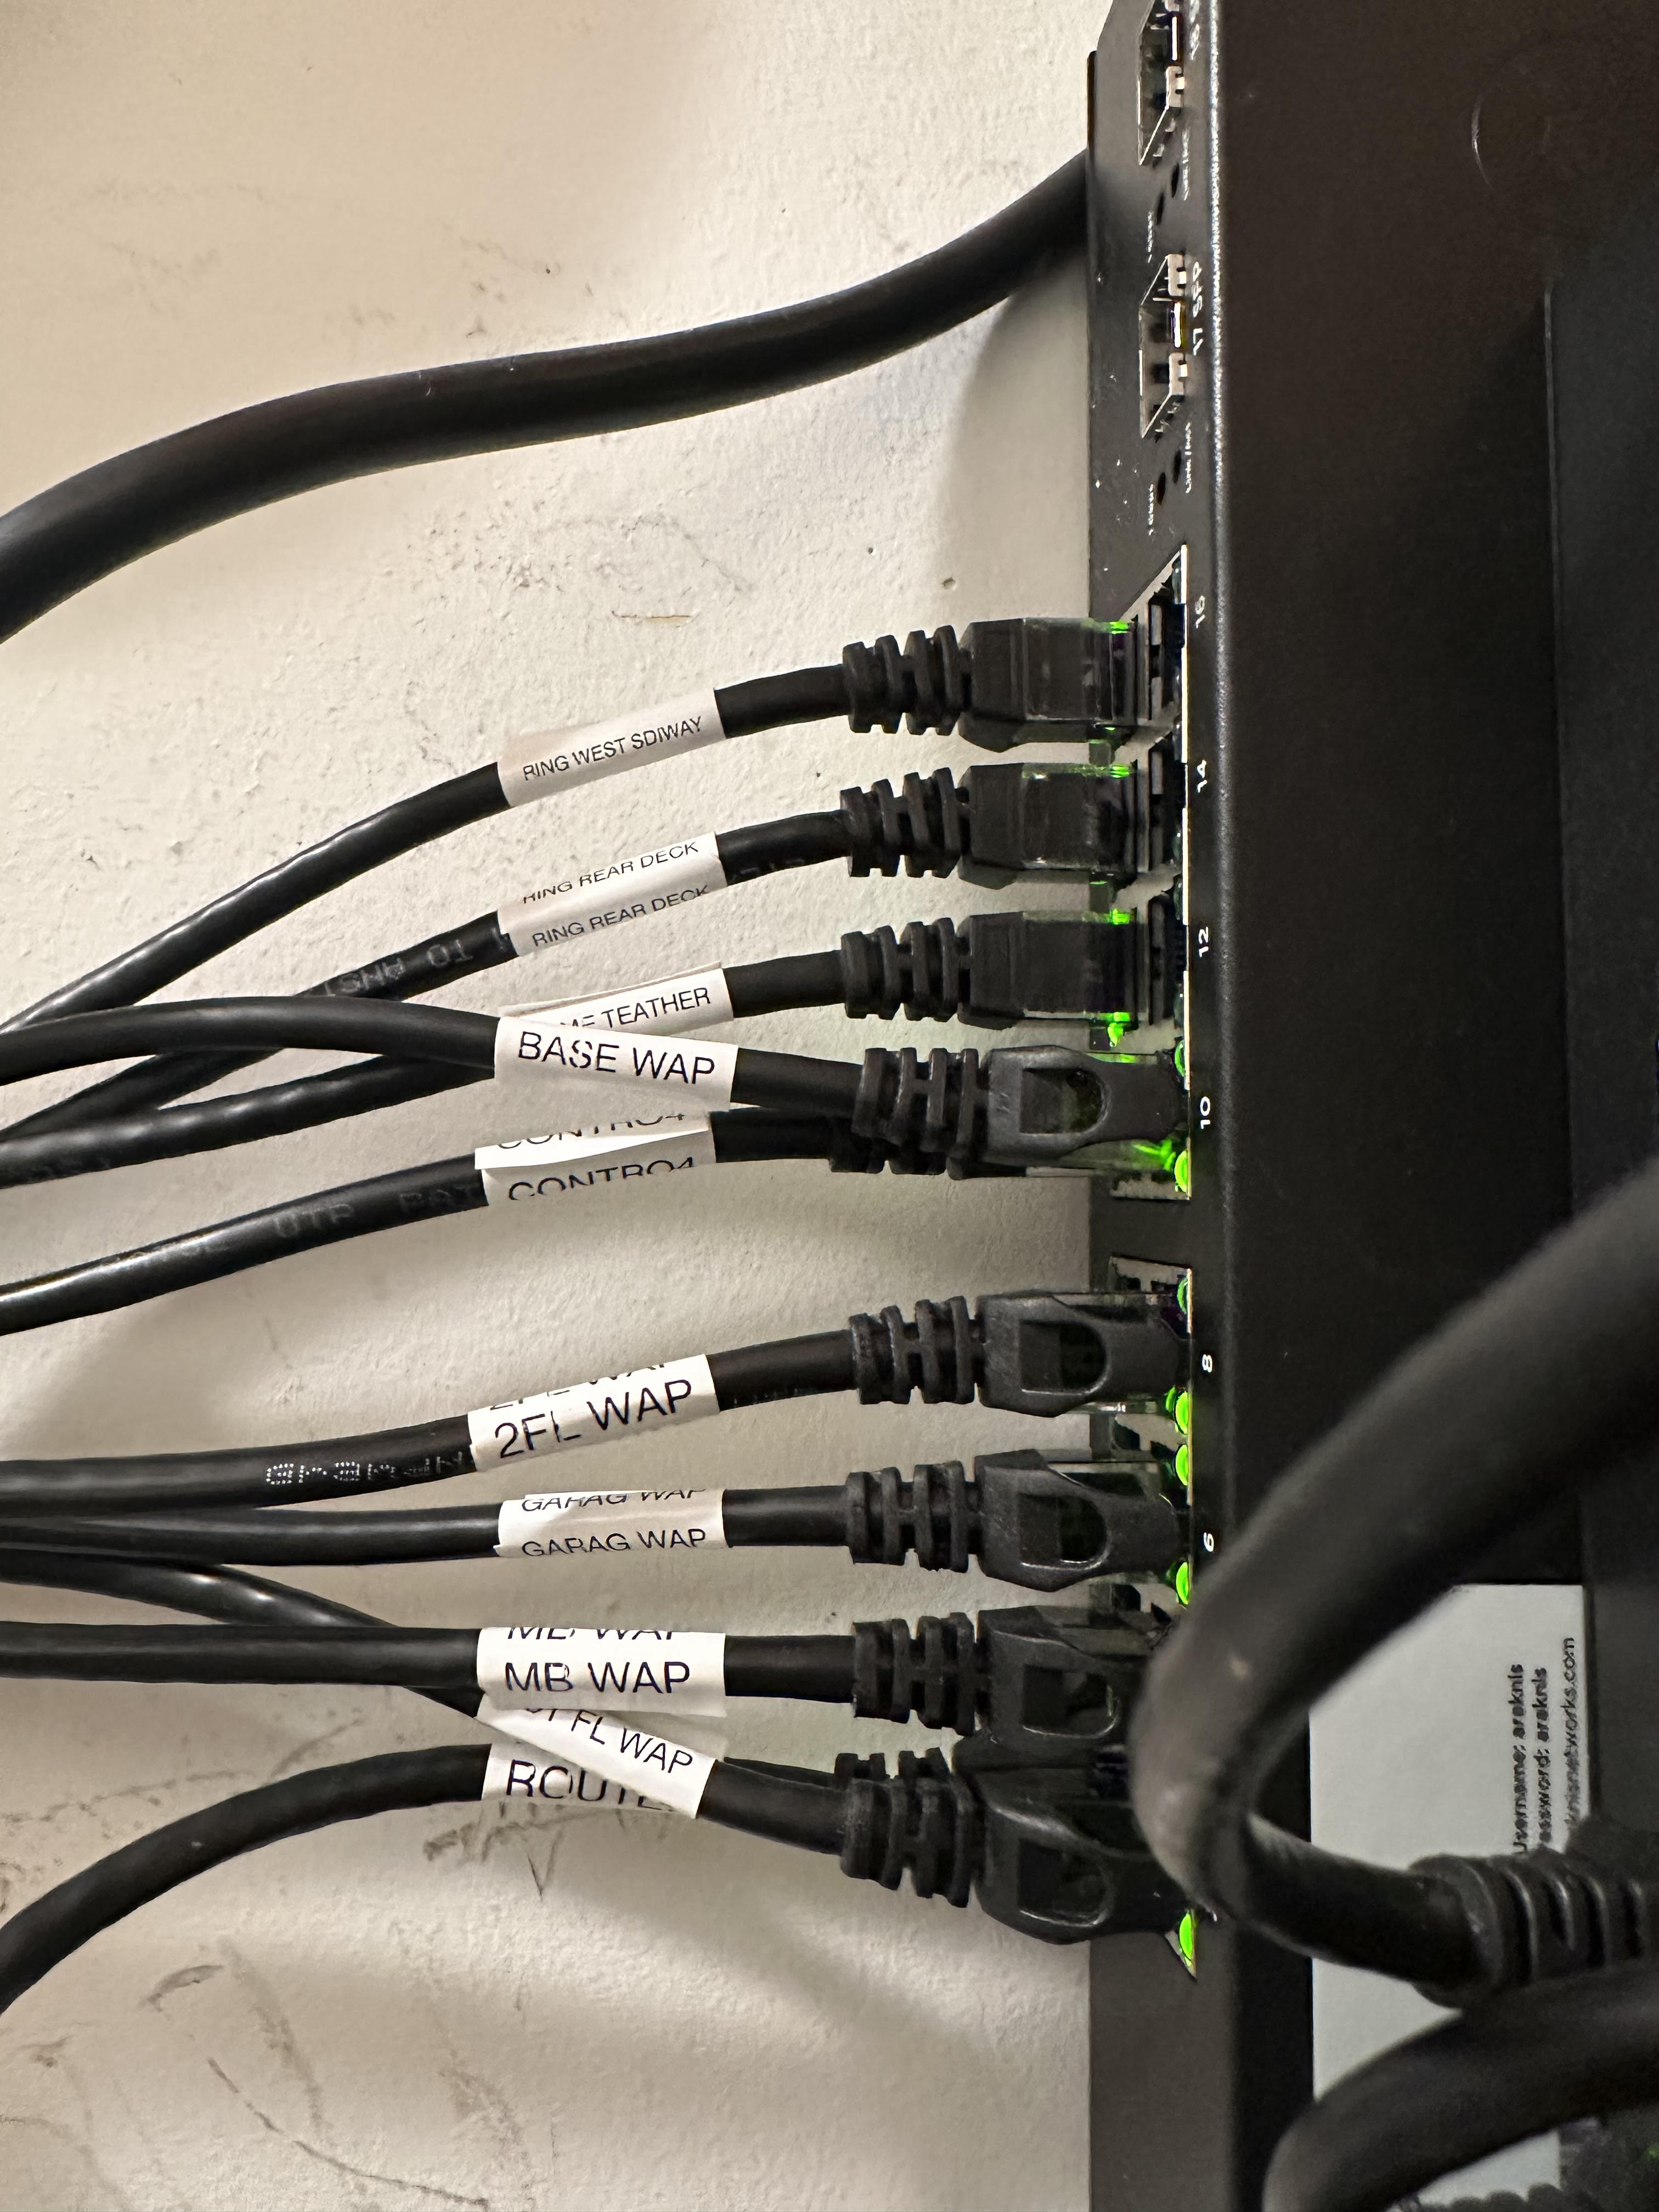
Professional switch installation with labeled cables for easy troubleshooting and maintenance.
What you see: A managed POE switch that powers access points and other devices through Ethernet cables.
Why it can help:
- POE Power: Access points get power through the Ethernet cable - no need for separate power adapters
- Centralized Power Management: Managed PoE ports may allow authorized remote power cycling
- Management: A managed switch adds visibility and configuration features; it does not inherently make every packet faster than a correctly sized unmanaged switch
- Professional Labeling: Every cable is labeled, making troubleshooting easy
- VLAN Support: Can separate network traffic (guest network, IoT devices, main network) for better security and performance
Labeling matters: Matching labels and a port schedule make service faster and safer. This is useful in any network, whether installed by a homeowner or a professional.
3. Wattbox Power Management System
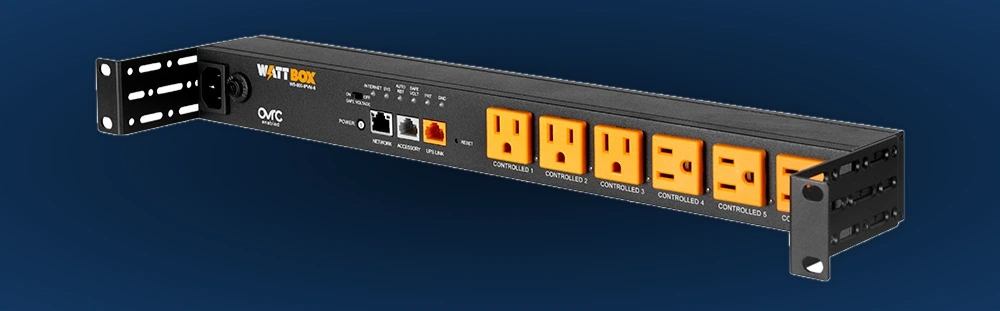
SnapAV Wattbox 800 IPVM power management system for smart power control and remote rebooting.
What you see: A WattBox 800-series IP power-management unit used with network equipment. Exact outlet features depend on the model and configuration.
What it can provide:
- Remote control: Authorized users can control supported outlets through OvrC when the unit, account, and internet connection are available
- Power sequencing: Supported outlets can be configured for a planned restart order
- Power protection: Review the exact unit's published surge-protection specifications; no device can guarantee protection from every power event
- Monitoring: Available measurements and alerts vary by model
- Automated recovery: Watchdog behavior must be intentionally configured and tested to avoid unnecessary reboot loops
- Integration: Confirm the current driver and supported functions before promising third-party control
Alternative: A listed surge protector or UPS may be sufficient where remote outlet control is not required. Match power protection to the equipment and service plan instead of assuming every rack needs the same product.
4. Professional Rack Mounting: Organization Matters
What you see: Everything mounted in a clean, professional 4U wall-mount rack.
Why it's superior:
- Organization: Everything has its place - easy to find and access
- Professional Appearance: Looks clean and professional, not like a mess of cables
- Ventilation: Leave the equipment manufacturer's required clearances and check operating temperatures
- Physical access: An open rack does not prevent tampering; use an appropriate lockable enclosure or secured room when needed
- Expansion: Reserve rack space, switch ports, and power capacity for the additions you expect
- Cable Management: Cables are organized, labeled, and routed properly
Planning difference: A small network can work well without a rack. As device count and system importance grow, labeled cabling, documented connections, suitable ventilation, and accessible power make diagnosis and future changes easier.
Strategic Access Point Placement: The Key to Strong Coverage
One of the biggest differences between professional and DIY installations is access point placement. Professionals don't just throw access points anywhere - we strategically place them based on your home's layout, construction, and coverage needs.
Wall-Mounted Access Point
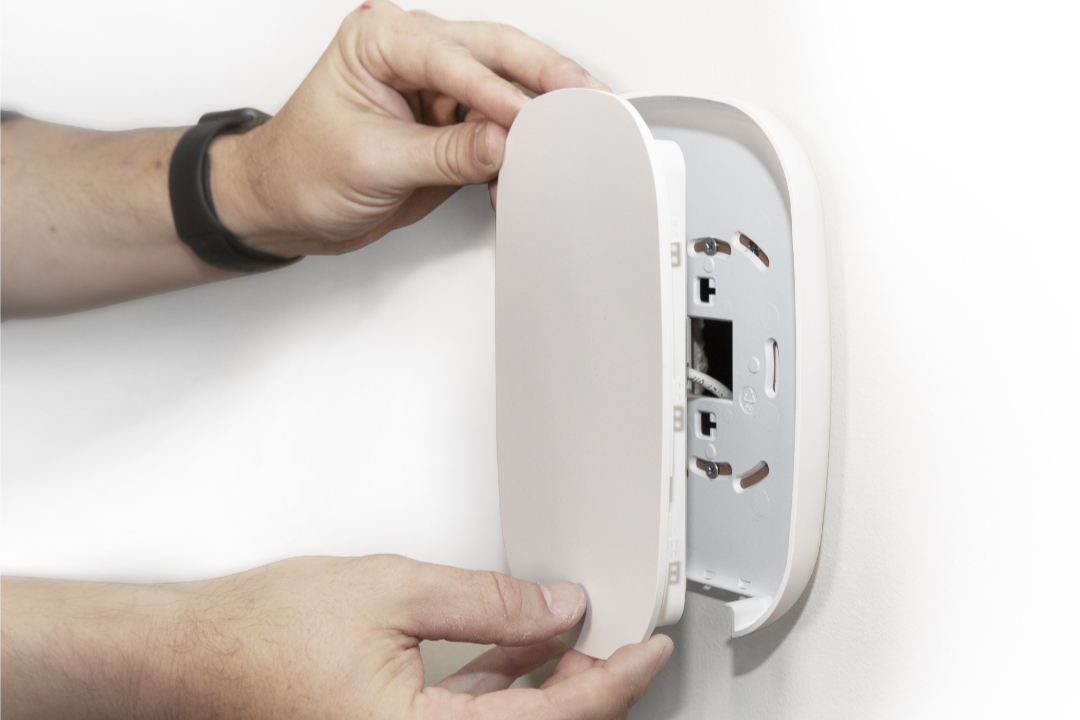
Professional wall-mounted Araknis access point installation for optimal coverage and performance.
What you see: An Araknis access point mounted on the wall in a strategic location.
Why the mounting position matters:
- Antenna pattern: Use the orientation and mounting method specified for the access-point model
- Out of the Way: Not taking up desk or shelf space
- Professional Appearance: Clean, flush mounting looks professional
- Coverage goal: Validate the chosen position with a survey rather than assuming a wall mount is automatically best
- POE Powered: Gets power through Ethernet cable - no visible power adapter
In-Ceiling Access Point for Basement Coverage
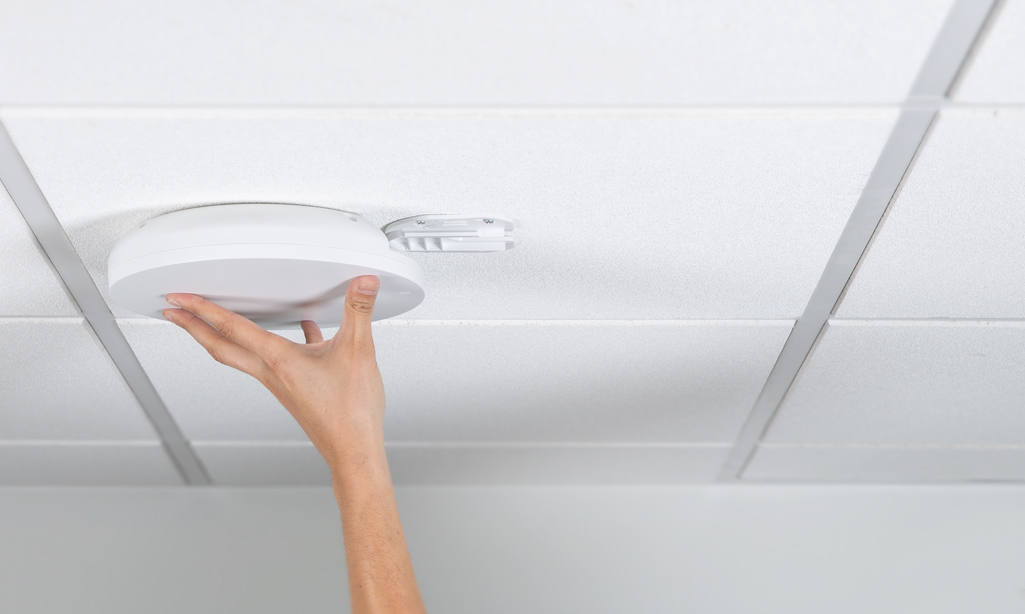
In-ceiling access point installation in a basement drop ceiling for a visually discreet result.
What you see: An Araknis access point mounted in the ceiling of a basement with a drop ceiling.
Why ceiling mounting can fit this model:
- Discreet Installation: A correctly finished mount can visually blend with the ceiling
- Antenna Orientation: Many indoor access points are designed for horizontal ceiling placement; check the exact model's pattern and instructions
- Professional Integration: Uses proper mounting brackets that make it flush with the ceiling
- Useful for Basements: A local access point can improve service when floor construction weakens signal from above
- Multi-Level Coverage: Signal may reach an adjacent level, but each in-scope floor still needs validation
Professional In-Ceiling Bracket Installation
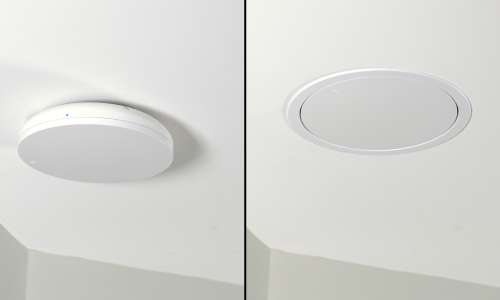
Before and after: A compatible in-ceiling bracket can reduce how far the access point projects from the finished ceiling.
What you see: The difference between a proper bracket installation (after) and without (before).
Why proper brackets matter:
- Flush Installation: Access point sits flush with the ceiling - looks professional
- Proper Support: Bracket provides structural support for the access point
- Clean Appearance: No gaps, no visible hardware - looks like it belongs there
- Secure mounting: Use the approved bracket, fasteners, and support for the device and ceiling construction
- Designed for Araknis: Brackets are specifically designed for Araknis access points
Check the mounting instructions: A shelf, wall, or ceiling position may work when the exact model supports it and coverage is tested. Do not recess an access point or improvise its support unless the manufacturer permits that installation method.
Wi-Fi 6 Access Points: Useful Features, Not Automatic Results
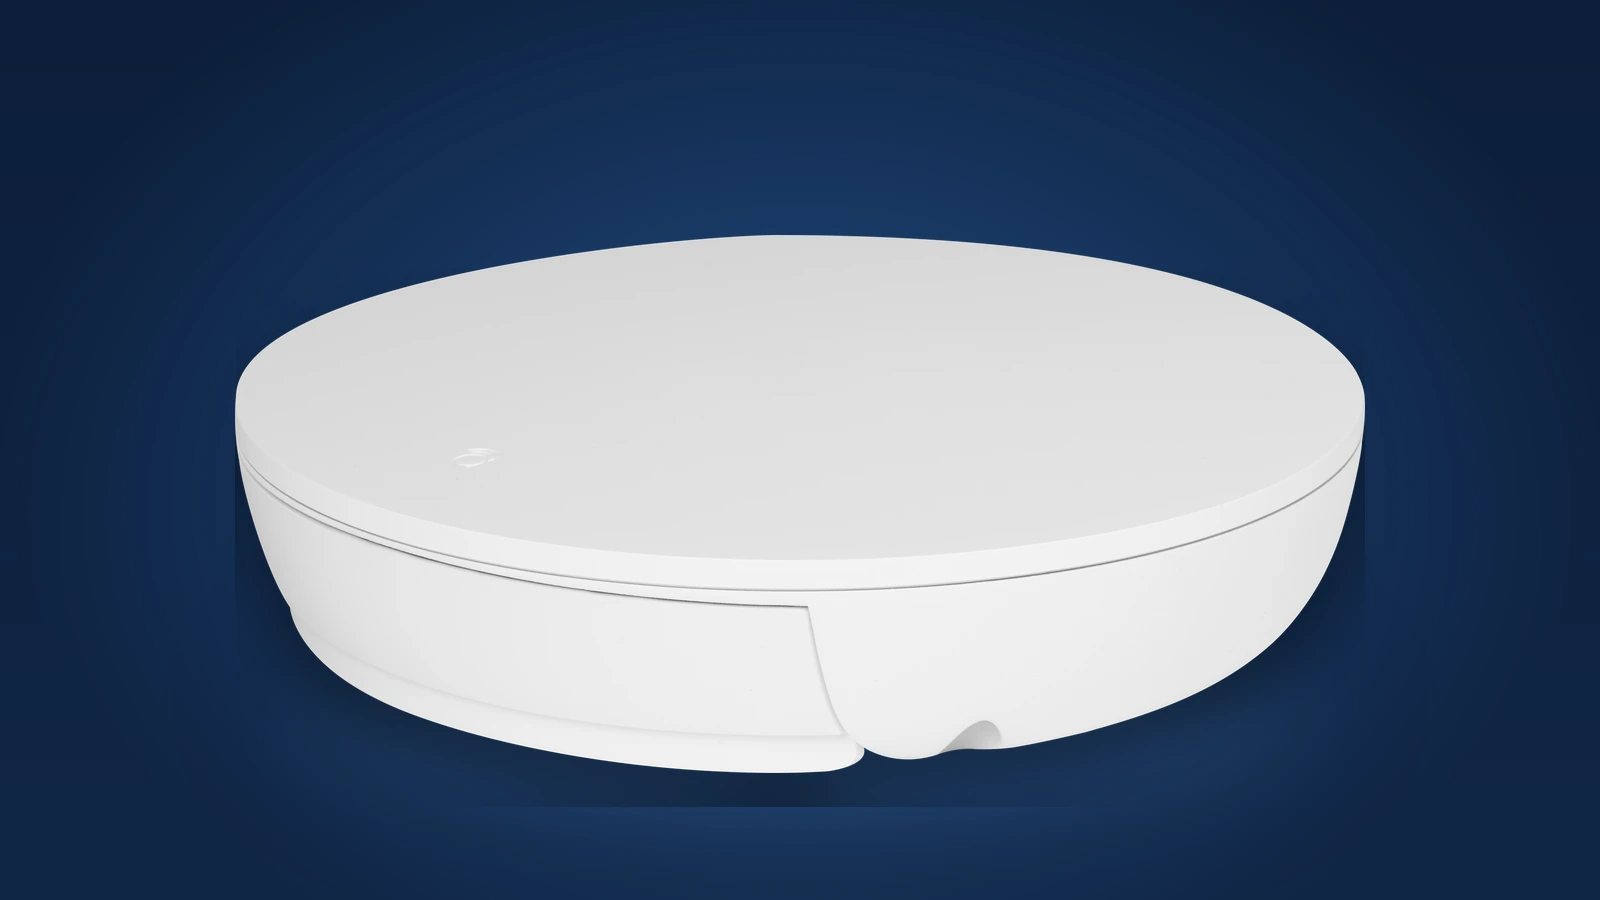
Araknis WiFi 6 520 Series access point providing high-performance wireless coverage.
What you see: An Araknis 520 Series indoor Wi-Fi 6 access point. Wi-Fi 7 products also exist, so Wi-Fi 6 should not be described as the latest standard.
What Wi-Fi 6 can add with compatible devices:
- Higher potential throughput: Actual speed is limited by the client, channel width, signal quality, wired uplink, interference, and internet service
- Efficiency: OFDMA and related features can improve airtime use in busy networks with many devices
- Latency: Better airtime efficiency can help, but it does not guarantee a lower-latency internet path
- Battery features: Target Wake Time can help compatible devices that implement and use it
- Compatibility: Older Wi-Fi devices can still connect when the network is configured to support them
- Range: Do not assume a new generation overcomes building materials; placement and band remain critical
Wi-Fi generation is one design input: Select Wi-Fi 6, 6E, or 7 from the mix of connected devices, band availability, uplink, switch ports, coverage plan, and budget. A newer badge cannot compensate for poor RF design.
Professional vs DIY: Side-by-Side Comparison
What to ask a professional to deliver
- Equipment selected for the required throughput, features, and support
- Strategic access point placement
- Professional rack mounting
- POE switches for clean installation
- Wattbox power management
- Proper cable management and labeling
- WiFi 6 access points
- Professional configuration and optimization
- Remote monitoring and support
- Warranty and ongoing support
- Capacity sized from actual device and application requirements
- Coverage validated in agreed test locations
- Professional appearance
What to plan when installing it yourself
- Write down the rooms, outdoor areas, and applications that need coverage
- Test access-point positions before permanent mounting
- Label connections and leave equipment accessible
- Match power supplies and PoE capacity to the connected equipment
- Keep a private configuration record and secure account recovery details
- Measure performance where people actually use the network
- Decide who will maintain the system and handle outages
- Warranty and support depend on the selected retail product
- Capacity varies widely by model, configuration, traffic, and environment
- Coverage depends on placement and building construction
- Plan cable organization and ventilation
What a Professional Network Proposal Should Include
A professional proposal includes more than hardware. It should identify the design work, cabling, installation, configuration, documentation, testing, and support being purchased so the homeowner can judge the value against a simpler self-installed option.
1. Reliability
Professional setup: Equipment is selected for the required throughput, features, mounting, environment, and support model. Good configuration and monitoring reduce avoidable problems but do not eliminate failures.
DIY setup: Can be reliable when the product fits the environment and the owner maintains it. Troubleshooting becomes harder when there is no documentation or clear support owner.
Cost of downtime: If internet and Wi-Fi are business-critical, define response expectations, spare equipment, remote-access permissions, and what can or cannot be repaired remotely.
2. Performance
Professional Setup: Optimized for your specific home. Access points placed strategically for strong coverage. Configuration tuned for your devices and usage.
DIY setup: Performance can be good with suitable equipment and deliberate placement, but many packaged systems provide less diagnostic detail and fewer configuration options.
Real-world target: Define minimum signal, throughput, and roaming expectations for named rooms and outdoor areas, then test them. Do not promise perfect service everywhere or confuse Wi-Fi quality with the internet provider's performance.
3. Scalability
Professional Setup: Built to grow. Easy to add more access points, upgrade equipment, or expand coverage as your needs change.
DIY setup: Some ecosystems expand cleanly and others do not. Check supported node count, wired backhaul, switch requirements, account dependence, and product lifecycle before buying.
Planned growth: Spare switch ports, PoE headroom, suitable cabling, rack space, documented addressing, and replaceable components are more defensible than a promise that equipment will not need replacement on a fixed timeline.
4. Support and Maintenance
Professional setup: Support can include remote visibility and service, but the written agreement should state hours, response targets, charges, privacy controls, and when an on-site visit is required.
DIY setup: Support may come from the manufacturer, retailer, ISP, or owner. Review that support path before choosing the product.
Service value: A named support contact and good documentation can reduce uncertainty, but no installer can promise a network will never fail.
The Hidden Costs of DIY Network Setups
DIY setups seem cheaper upfront, but they have hidden costs:
- Equipment replacement: Service life varies by model, environment, updates, failures, and changing requirements; compare written warranty and support periods instead of assuming fixed lifespans
- Time Spent Troubleshooting: How many hours do you waste trying to fix connectivity issues?
- Upgrade costs: Any ecosystem can require partial or full replacement when support ends or requirements change
- Dead Zones: Incomplete coverage means you might need to buy additional equipment (extenders, mesh nodes) that still don't work as well.
- Security Issues: Poor configuration can lead to security vulnerabilities and potential data breaches.
- Productivity Loss: Slow or unreliable WiFi impacts work, entertainment, and daily life.
Real-World Example: What This Setup Provides
Let's look at what this specific professional network setup provides:
Complete Home Coverage
- Main Floor: Wall-mounted access point provides coverage for main living areas
- Basement: In-ceiling access point is intended to improve basement service; post-install measurements confirm the result
- Upper Floors: Additional access points can be added as needed
- Outdoor Areas: Outdoor access points can be added for patio, deck, and yard coverage
Smart Home Ready
- Connected devices: Capacity is planned from traffic, radios, wired links, switch ports, and application needs—not a marketing device count
- IoT segmentation: VLANs can reduce unnecessary access between groups when firewall rules, device discovery, and administration are configured correctly
- Guest network: A separate guest SSID can limit access to private devices, though guests still share internet capacity
- Traffic policy: Prioritization is configured only where it serves a defined bottleneck and application requirement
Professional Management
- Remote monitoring: With authorized access and a suitable support plan, supported equipment can report selected faults and help diagnosis. Not every failure can be detected in advance
- Remote recovery: Supported power controls can restart selected equipment when management access is available and the restart is safe. Hardware, wiring, or internet faults may still require a visit
- Managed updates: Supported firmware can be updated remotely after compatibility checks, backup, and a planned maintenance window
- Performance Optimization: We can adjust settings remotely to optimize performance
Common DIY Network Problems We Fix
We often get called to fix DIY network installations. Here are the most common problems:
Problem #1: Dead Zones Everywhere
DIY Approach: Put router in corner, hope for the best.
Our solution: Survey the in-scope areas, plan access-point placement and channels, then validate the agreed coverage and performance targets.
Problem #2: Constant Disconnections
Possible cause: Disconnections can come from RF interference, weak signal, software, internet service, cabling, power, a failing device, DHCP/DNS, or capacity—not merely crossing a device-count threshold.
Our solution: Isolate the failing layer, correct it, and verify the fix with the affected device and application. QoS is not a universal cure.
Problem #3: Slow Speeds
DIY Approach: Default settings, no optimization, interference from neighbors.
Our Solution: Professional configuration, channel optimization, WiFi 6 technology, and interference mitigation.
Problem #4: Security Concerns
DIY Approach: Default passwords, open guest network, no VLAN separation.
Our Solution: Proper security configuration, separate VLANs, strong passwords, and ongoing security monitoring.
Problem #5: Can't Handle Smart Home
Possible cause: Some networks struggle as traffic and radio contention grow, but many low-bandwidth smart devices are not equivalent to cameras, downloads, or video calls.
Our Solution: Network designed from the start for smart homes, proper device management, and scalability for future growth.
What to Look for in a Professional Network Installation
If you're considering professional network installation, here's what to look for:
✅ Professional Equipment
- A router with documented performance for the features the home will actually use
- Managed POE switches
- WiFi 6 access points
- Professional power management (Wattbox)
✅ Professional Installation
- Rack mounting or proper equipment organization
- Strategic access point placement (not random)
- Proper cable management and labeling
- Clean, professional appearance
✅ Professional Configuration
- Optimized settings for your home and usage
- Proper VLAN setup (guest network, IoT network, main network)
- QoS configuration for prioritized traffic
- Security best practices implemented
✅ Professional Support
- Remote monitoring capabilities
- Remote troubleshooting and fixes
- Ongoing support and maintenance
- Warranty on equipment and installation
Cost Comparison: Ask for the Same Scope
A fair comparison uses the same coverage areas, internet speed, wired ports, security features, battery backup, installation, support period, and warranty. Without that shared scope, broad totals are misleading.
For a DIY Quote, Include
- Router or gateway and every access point or mesh node
- Switches, PoE injectors, mounts, patch cables, UPS or surge protection
- Any cabling, tools, subscriptions, and replacement parts
- Your time for setup, migration, testing, documentation, updates, and support
For a Professional Quote, Confirm
- Exact hardware models, licenses, subscriptions, mounts, and power products
- Survey, cabling, installation, configuration, testing, and documentation
- Warranty terms and the boundary between manufacturer and labor coverage
- Support hours, response targets, recurring fees, and rates for future work
The honest conclusion: Either approach may cost less over time. Choose from the written scope, measured requirements, your ability to maintain the system, and the value of a service relationship—not an invented five-year total.
When DIY Makes Sense (And When It Doesn't)
DIY Makes Sense For:
- Spaces a supported consumer system can cover and serve at the required performance
- Projects with modest integration and management needs
- People who enjoy troubleshooting and have technical skills
- Rental properties where you can't make permanent changes
- Very temporary living situations
Professional Installation Makes Sense For:
- Properties where a survey or several wired access points are needed
- Homes with multiple floors, difficult materials, or outdoor coverage requirements
- Smart homes with important wired, PoE, segmentation, or remote-service requirements
- People who work from home
- Gamers or streamers who need reliable, fast speeds
- Anyone who values reliability over saving a few dollars
- Homes with WiFi dead zones
- People who don't want to troubleshoot network issues
Bottom line: Professional installation is worth considering when the installer can show what will be designed, measured, documented, and supported. The word “professional” by itself is not proof of performance.
What's Next: Getting Your Professional Network Installed
Ready to upgrade from DIY to professional? Here's what to expect:
Step 1: Site Survey
We visit your home to assess layout, construction materials, existing equipment, and coverage needs. We identify dead zones and determine optimal access point placement.
Step 2: Custom Design
We create a custom network design based on your home and needs. This includes equipment selection, access point placement, and configuration planning.
Step 3: Professional Installation
Our installers mount the specified equipment, run the approved cabling scope, configure the network, and test the agreed areas. Any required electrical, firestopping, permit, or finish work should be assigned to the appropriate trade in the proposal.
Step 4: Optimization and Testing
We test the in-scope coverage locations, throughput, interference, wired links, and roaming behavior; save the results; and explain the network and support process to the homeowner.
Step 5: Ongoing Support
Remote monitoring and support are provided only when included in the project or service agreement and when the required accounts, permissions, platform, and internet connection are available. Some faults require an on-site visit or another provider.
Ready to Upgrade to a Professional Network?
Replace guesswork with a defined network scope: the rooms and outdoor areas to cover, applications to support, cabling available, and measurements used for acceptance.
What's Included:
- Professional site survey and design
- Araknis equipment sized for the home's network requirements
- Strategic access point placement
- Professional rack mounting and cable management
- Wattbox power management
- Access points selected for the mix of connected devices, bands, uplinks, and coverage plan
- Professional configuration and optimization
- Remote monitoring and ongoing support
Or message us on WhatsApp
Primary references
Araknis networking · Luxul networking · CEDIA smart-home wiring guidance. Reviewed August 15, 2026. Product capability does not guarantee coverage or speed. Results depend on the internet service, building materials, RF conditions, cabling, access-point placement, channel plan, connected devices, firmware, and measured validation after installation.
Final Thoughts
A good professional installation should be different in ways you can verify: an agreed design, correct mounting and cabling, configuration records, measured results, and a clear support owner.
Your WiFi shouldn't be a source of frustration. With a professional network installation, you get:
- Coverage targets for the named rooms and outdoor areas
- Performance tests using representative connected devices
- Documented limitations and any out-of-scope locations
- Capacity planned from real applications and traffic
- Professional appearance and organization
- Peace of mind knowing it's done right
- Ongoing support when you need it
If Wi-Fi problems continue after basic checks, the next step is diagnosis. An upgrade is justified only after the bottleneck and requirements are understood.
Transform Your Home Network Today
Don't let poor WiFi hold you back. Get a professional network installation that provides the performance, reliability, and coverage your smart home deserves.
Schedule Free Network ConsultationWhatsApp: Message us | Email: services@denalitechs.com